Showing posts with label homemade. Show all posts

kalakand recipe with paneer and condensed milk / Orange Kalakand burfi recipe /

0

Kalakand Recipe with Paneer and Condensed Milk / Holi Special Food / Kalakand Burfi Recipe with Oranges


Kalakand - Indian milk cake sweet - an amazing dessert 🍨 which is made during festival seasons. This sweet is loved by almost everyone as it is so rich and delicious 😋. I have already posted the basic recipe of kalakand burfi. 


milkmaid dishes

Today's post of kalakand has a twist in it. I have added some fresh orange 🍊 pulp which makes it more tasty with a unique and typical taste. When I googled for this recipe, I did not find any but I found mango kalakand. So I prepared this sweet on a similar basis using oranges as this is the season of oranges.

holi food items

Talking about the taste, as I said earlier, it is very yummy. Though it is a bit chewy, it is a mouth watering sweet. I have prepared this milk cake for the occasion of Holi. The previous post of kodbale which is a savory snack is also a special recipe for Holi.

kalakand burfi recipe with oranges

You can also check my other festive recipes like

Chena Poda

Pumpkin Halwa

Custard Apple Rabdi

Palkova Recipe

Sabudana Vada Recipe

Poha Kesari

Carrot Kheer

Boorelu

Coconut Jaggery Laddoo

Paneer Kheer    and   many more.....


Preparation


Heat milk in a pan. Allow it to come to a boil.


When it starts to boil, add curd. You can also add lemon juice or vinegar to curdle the m milk. But in the latter case, you need to wash the Chena under running water to get rid of the sour taste from the lemon or vinegar.


Keep stirring gently until the milk Is completely curdled separating the chenna and whey. Now switch off the flame and strain the whey. Strain in such a way that there is no moisture left in the paneer


Take the Chena ( without any moisture ) in the pan and put it on a low flame. Strain the chenna well without any moisture. My pic shows that there is water, but make sure that you are not left with any water to speeder the cooking process and to get a soft kalakand. 


Add the orange 🍊 pulp and mix well.


Add the condensed milk and keep stirring to avoid burning at the bottom.


Cook on a low flame until there is no moisture left.


Meanwhile keep a plate or a pan greased with ghee and set aside.


When the water is completely evaporated from the mixture and you are left with a mass, switch off the flame.


Transfer to the greased pan and even it with a knife. Sprinkle dry fruits of your choice and allow it to come to room temperature.


Keep it in the fridge for 2-4 hours or overnight and cut into desired shapes. Enjoy with friends and family.

milkmaid recipes


Ingredients


Milk  1 l

Orange  pulp 1/4 cup

Condensed milk  1/4 cup + 4 tbsp.

Curd  4 tbsp.

Ghee  2 tsp

Nuts  to garnish

Method

  1. Bring milk to a boil. 
  2. Add curd when it is boiling and allow the milk to curdle completely.
  3. Drain the whey from the chenna.
  4. Take the Chena in the pan and put on a low flame.
  5. Add condensed milk and orange pulp and mix well.
  6. Cook on a low flame until the moisture is completely evaporated.
  7. transfer to a greased pan and garnish with nuts of your choice.
  8. Allow to come to room temperature and refrigerate for 2-4 hours or overnight.
  9. Remove and cut into desired shapes.

Notes


  • If you do not have condensed milk, then cook milk until 1/4 th of its volume and then add Chena and orange pulp.
  • Do not cook Chena for long as it will become too hard if cooked for long.
  • Alternatively, you can first mix condensed milk and orange pulp. Cook until thickened and then add chenna. This way, the kalakand remains soft and tasty.
  •  It took a long time for me to get the water evaporated as I had not strained the chenna well. But you do not do the same mistake as mine. Do strain the paneer well and then add the remaining ingredients like orange pulp and condensed milk. 


Continue ...

Juicing Sugarcane / Sugarcane Juice Recipe / Sugarcane Recipes

0

Juicing Sugarcane / Sugarcane Juice Recipe / Sugarcane Recipes 


Today's recipe is made with another seasonal ingredient - sugar cane. The markets and shops are full of sugarcane sticks during pongal and the following month. This year my mom in law made the famous sweet  pongal dish with this sugarcane. It tasted awesome. I did plan to post the same but as told earlier, I was very busy to capture and update. But I sure would do the same in the coming posts one day.

sugarcane recipes

But for today, it's the sugarcane juice. Everybody I feel loves this sugarcane juice. My kids love this juice and they also love chewing the pieces as well. I make it a point to see that they eat the seasonal foods which are said to be loaded with nutrition and health thereby increasing the immunity in them.
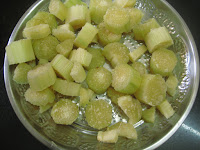
This sugarcane juice is so very easy to prepare with no additional ingredients at all. Just peel the skin, chop into small pieces and put them in blender to extract the juice. So lets start off. 


sugarcane juice ingredients


Preparation

Peel the skin of the sugarcane sticks with the help of a knife 🔪.


Then chop into small pieces removing the pieces that are hard in between.


Put these pieces in a blender ( mixie ) with little water. Add little water just enough to run the mixie jar. If you add too much water, then the juice will get diluted and will lose its sweetness.


Mixie well and strain the juice using a filter. Squeeze the pulp with your hands in the filter.


Repeat the process until you are done with all the pieces.


Add lemon juice if desired with some ice cubes and enjoy this drink with your family and friends. 

juicing sugarcane at home


Ingredients

Sugarcane 1/2 a stick


Method

  1. Peel the skin of the sugarcane with knife.
  2. Chop into small pieces.
  3. Put in a mixie jar and mixie with little water.
  4. Filter the juice and squeeze the pulp with your hands.
  5. Add lemon juice and ice cubes according to your liking and serve.

Notes

  • Do not add too much water while grinding in the mixie. Just add enough water to run the mixie.
  • I served plain juice as my kids prefer it that way.


Continue ...

Freezing Green Peas / Best Frozen Peas / How to Freeze Green Peas At Home / Homemade Frozen Green Peas

0

Freezing Green Peas / Best Frozen Peas / How to Freeze Green Peas At Home / Homemade Frozen Green Peas


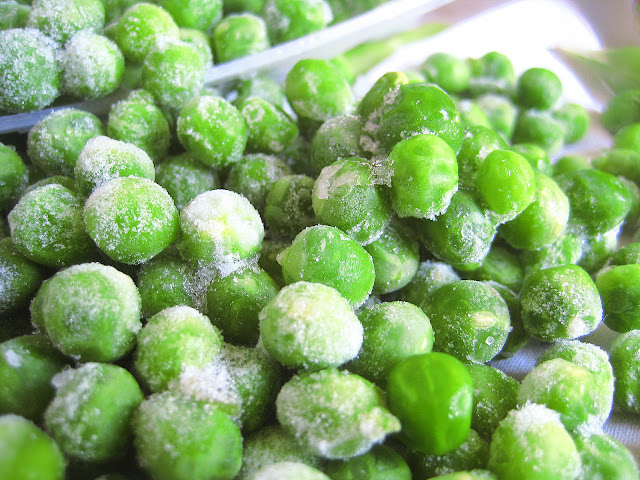
how to freeze green peas at home

Hey friends, I was so busy the whole of last month since Christmas. The visit of my in laws, the festive season of Pongal and my man's birthday 🎂 kept me away from updating this blog. But I am back with more energy, enthusiasm and of course interesting recipes.
Today's recipe is very useful to make our lives easy and hassle free. This is the recipe to prepare homemade frozen green peas. Everybody loves green peas but we all know that they are seasonal. Using this method we can store green peas for almost a year and enjoy this seasonal veggie for the whole of the year. Though frozen peas are easily available in the market, I prefer to make them at home for three main reasons. Firstly, I have the option to choose the best green peas and remove any rotten ones. Secondly, they are more economical when compared to the store bought ones. Lastly, they are more hygienic when prepared at home.


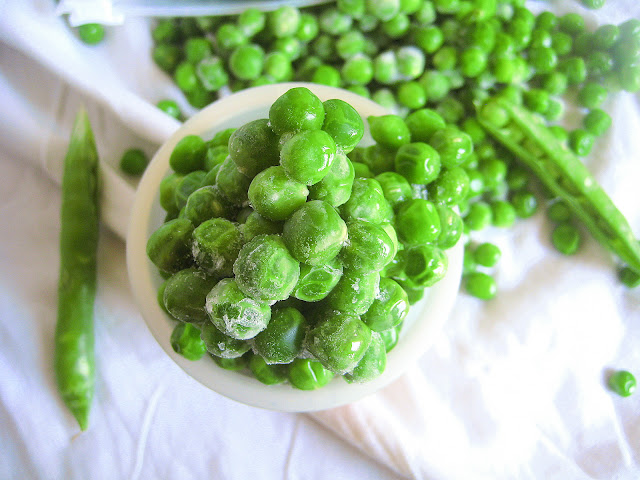
homemade frozen green peas

To get perfect frozen peas, you need to select the fresh ones which are neither under ripe nor over ripe. The under ripe peas are the ones which are small in size and are very tender. The over ripe peas are fuller and are lighter in colour when compared with the just ripe green peas. The over ripe peas are bitter in taste while the just ripe peas are sweet in taste and soft on cooking. Here in this recipe, we are going to blanch the green peas and freeze them for a long time. Blanching is very important to freeze the peas, else they will ripe even in cold temperatures. Blanching the peas will stop them from ripening and retaining their sweet taste for a long time to come. 

storing green peas for a year

I had this recipe in my drafts folder since last year, but unfortunately I could not get fresh green peas. So this year, I made it a point to get to the local market which is called Santha that is held every Sunday near my place. I indeed was lucky 🍀 enough to lay my hands on the best green peas that were fresh from the farm. Now straight to the recipe.

Preparation


Separate the green peas from their pods. This task might eat your time, but its worth the effort. You can do this while watching any of your favourite TV 📺 show to save your time. Wash the peas and keep them aside. Put a container of water on full flame and bring it to a boil.


Add the washed peas when the water is boiling. Continue to cook on high flame until the water starts to boil again.


When the water starts to boil again, set the timer to 1 1/2 minutes ( 90 seconds ). Once the timer stops switch off the flame immediately. 


By this time, all the peas would be floating on the water.


Now quickly strain the water from the peas using a colander and put it under running cold water until the peas come to room temperature. 


You can also pour some ice cubes or ice cold water in the green peas to stop the cooking process. Once they are cooled, dry them on a clean kitchen cloth or a cotton cloth ...


......until there is no moisture left on the peas.


Now, you can pack them in zipper bags or freezer safe containers and store them in your freezer shelf.


Use them when necessary. Just thaw them before using or keep the required amount of peas at room temperature for half an hour before using in your preparation. I follow the second method. 

how to store green peas for long time

Ingredients


Green peas 1 kg
Water  1 1/2 litres


Method

  1. Discard the pods from the seeds and wash the peas and keep aside.
  2. Bring a big bowl of water to a boil on a high flame.
  3. Add the peas when the water is boiling and cook on a high flame until it starts boiling again.
  4. Set the timer to 1 1/2 minutes and switch it on the moment the water starts boiling again.
  5. Switch off the flame as soon as the timer is stopped and drain the water using a colander.
  6. Add some ice cold water or ice cubes or put it under cold running water to stop the cooking process.
  7. When the peas are cooled, dry them on a clean kitchen cloth until there is no moisture left on them.
  8. Transfer these dried blanched peas to zipper bags or freezer safe containers and freeze them until use.
  9. These frozen peas stay good for months to come.

Notes


  • Make sure that you are using a wide and big bowl for blanching the peas. There should be enough space for the peas to cook else they will not get cooked properly.
  • The process of cooking should be stopped as soon as possible after the timer has ran out, otherwise the peas cook further because of the warmth and will become mushy for later use.
  • You can also label these packs of frozen peas with their respective dates of preparation for future reference.
  • Do not cook for more than the given time i.e. 1 1/2 minutes ( 90 seconds ).
  • Whenever you want to use them, just keep the required quantity of frozen peas at room temperature for half an hour and then your peas are ready to be used in any recipe.
  • You need not cook these frozen peas for a long time in any recipe. Just add them at the end of the recipe i.e. just 5-10 minutes before switching off the flame and you will be done. 


Continue ...

palkova recipe / palkova sweet recipe

0

Palkova Recipe / Kova Sweets Recipes

 
paalakova

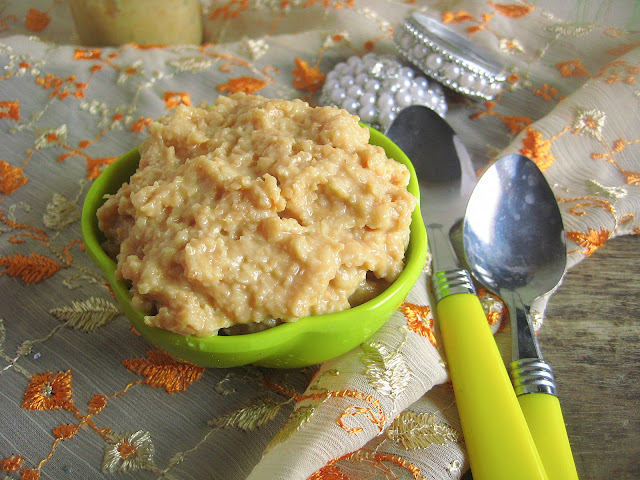
Kova is a delicious, creamy and rich dessert that is prepared with milk and sugar. It is so yummy 😋 that it just melts in your mouth. This is also popularly known as palkova. In my grandmother's place, we used to call it as plate kova. Our village which is in Srikakulam district of Andhra Pradesh is famous for this kova.

paalakova recipe

I remember my childhood days, when my relatives often used to surprise us with this excellent dish. There are just three ingredients that are required to prepare this awesome sweet dish i.e. milk and sugar. The third and the most important ingredient being patience. We need a lot of patience and time to complete the sweet. I have prepared kova with 3 litres of milk and it took almost 8 hours for me to finish it. Now isn't it a long time? But the end result was delicious and fruitful because my kids and my husband loved it so much.
 
sweet palakova recipe

I have already shared the recipes of Kalakand and condensed milk which are also prepared in the same procedure as this kova.


Procedure

Take milk in a pan. Put it on low flame.


Cook until it becomes thick. Keep stirring occasionally to avoid milk burning at the bottom of the pan. Also, do not forget to scrap the edges of the pan once in a while. When the milk thickens,

add sugar and stir until it dissolves completely.


When the milk is completely dissolved, the milk mixture tends to liquidify again.


Keep cooking until the mixture becomes thick again.


Switch off the flame and bring it to room temperature. Store in a glass jar in the refrigerator. Stays good for upto a week.


sweet kova recipe

Ingredients 

Milk   3 litres
Sugar  1 cup
Lots of patience


Method

  1. Heat milk in a wide and thick bottomed pan. Cook on a low flame. 
  2. Keep stirring occasionally to avoid burning at the bottom of the pan. Also, keep scraping the edges of the pan. 
  3. When the milk becomes almost one third of the original quantity ( thickens ), add sugar and mix well.
  4. Cook further until it thickens and switch off the flame.
  5. Bring it to room temperature and store in a glass jar.
  6. This sweet Kova stays good for upto a week.

Notes

  • This paalakova can be prepared in a quicker way with condensed milk as well which will be discussed soon in this site.
  • Palakova can also be prepared with kova. Just add sugar to the unsweetened kova and cook till you reach the desired consistency. 

Continue ...

cardamom elaichi powder

0


Cardamom ( elaichi ) Powder Recipe / Homemade Green Cardamom Powder Recipe


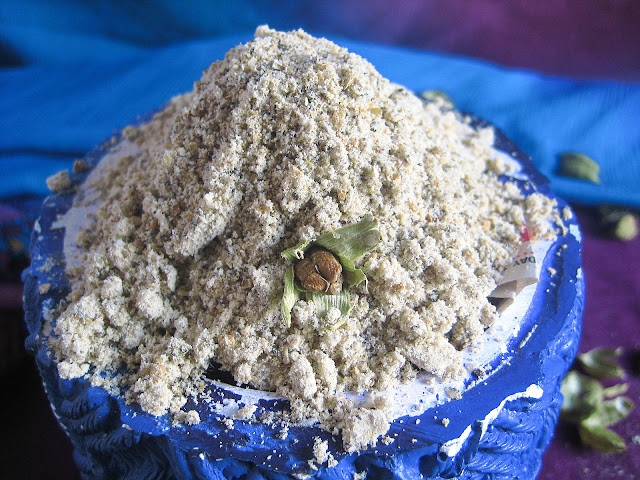
cardamom powder recipe

Since the last post I have started posting the important ingredients that are necessary for the festive season. This calls for some advance preparations. In the last post, I have discussed the preparation of ghee which is very important for any sweet dishes. Today´s post is another recipe that makes our task easier during the making of Prasadam recipes for God. It also saves our time as well.  

cardamom powder


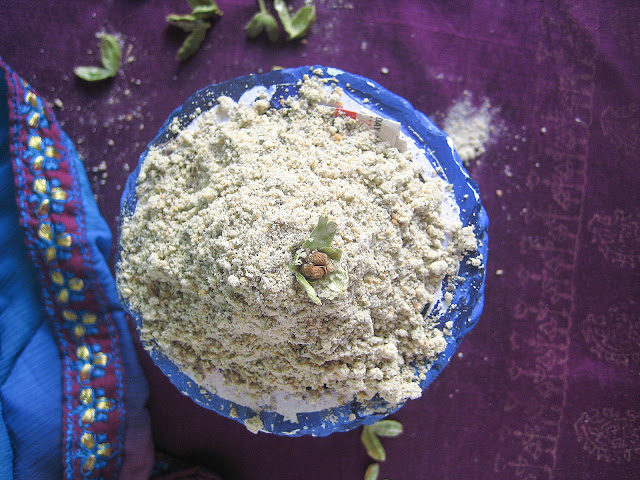
The next main ingredient for the festive dishes or Naivedhyam recipes is the elaichi powder or cardamom powder. My mom generally prepares this in advance and stores it in the refrigerator for future use. Doing it this way, saves our time while preparing any dish. Moreover, it becomes very difficult to grind cardamom in small quantities. So I prefer to prepare the homemade cardamom powder in advance and store it this way.

homemade elaichi powder recipe

Preparing cardamom powder is like a cakewalk. It is very easy and simple task that can be done in just a few minutes. The only time-taking work is peeling the skin of the cardamom. I usually peel the skin of the elaichi pods and separate the seeds from them. I just use the seeds for the preparation of the homemade elaichi powder. I do these kind of tasks while watching any of my favourite shows on the television. I also make use of the skin in other preparation which I will be discussing in another post. So do not throw away the peels of the cardamom pods.


Preparation


Peel the skin of the cardamom pods and separate the seeds.


Take the seeds in a mixie jar and ground to a coarse powder. 


Now add sugar and then grind to a fine powder.


Sugar is added to help grind to a fine powder. Once grounded, your kitchen will fill with the aroma of the cardamom powder. When I was preparing the elaichi powder, my daughter was amazed at the smell and she came running to the kitchen to find out what I was preparing for her. And she wanted to taste the powder itself.


Now, transfer this powder to an airtight container and store in the refrigerator for months to come. Use it as and when needed. 

  
how to make cardamom powder at home


Ingredients


Cardamom pods 100g

Sugar 3 tbsp.


Method


  1. Peel the skin of the elaichi pods and separate the seeds.
  2. Grind the seeds to a coarse powder.
  3. Add sugar and grind them to a fine powder.
  4. Remove to an airtight container and preserve in the refrigerator for future use.


Notes


  • You can also grind it along with the skin but I prefer it this way as it gives more flavour when the skin is eliminated.
  • Do not throw away the peels of the cardamom, as they can be useful in other recipes which I will discuss in a later post.
  • Adding sugar will help us in attaining a fine powder. If you like the coarse powder, then you can grind to a coarse powder skipping the sugar.
Continue ...