Showing posts with label varalakshmi vratam specials. Show all posts

soya bean sundal

0

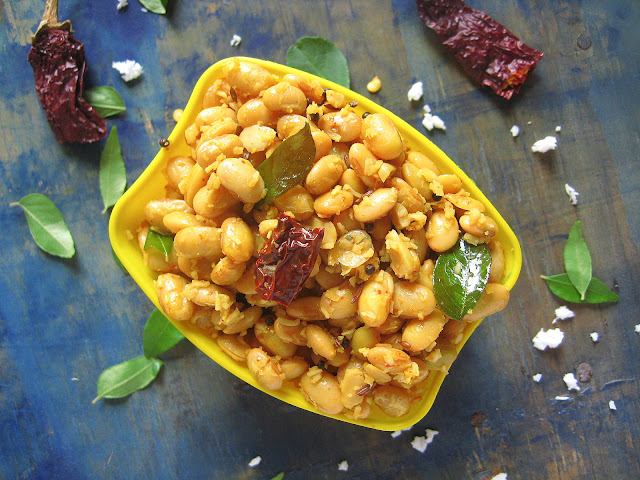
Sundal Recipes for Navrathri / Soya bean Sundal Recipe


soya bean sundal recipe

The dish for the third day of Navrathri is one kind of a sundal recipe. It is soya bean sundal which is very healthy and tasty too. Soya beans are considered to be one of the healthiest bean varieties that are available in our country. It is known to be a good source fiber, calcium, Vitamin B and omega-3 fatty acids. Soyabean is the richest plant source of proteins. Hence it is always recommended to include soy products in our diet.

special recipes for navrathri

Consuming soyabean during this festive season not only keeps us healthy but also gives us the extra energy that is required to complete the extra activities during this Dussehra season. It does not take much time to prepare this sundal variety. The ingredients that are required to prepare this soyabean sundal are also very basic that we have in our kitchens regularly.

navrathri specials

It is said that for each day of the nine days of Navrathri, we prepare each variety of sundals with the Navadhanya - namely - Bengal gram ( channa dal ), wheat ( godumulu ), Horse gram ( ulavalu ), Green gram ( Pesara pappu ), Rice ( biyyamu ), White beans, black sesame ( nalla nuvvulu ), Chickpeas ( kommu senagalu ) and  Black gram ( minapappu , urad dal ).

soybean sundal recipes

I have already shown the recipe for the chickpea sundal. Today, I am posting the recipe of soyabeans sundal. While the chickpea sundal is offered to the planet Mars, the soyabean sundal is offered to the planet Venus. The other navadhanya sundals are offered to other planets accordingly.

The soyabean sundal is very delicious as an evening snack. This is also very good for an after-school snack for kids. Soyabeans are low in fat, yet are very filling. Prepare this easy sundal for this Navrathri season and enjoy with your family. Happy Navrathri!

sundal recipes


Preparation


Soak soyabeans overnight or atleast for 5 hours. Drain the water from the soyabeans and cook them in a pressure cooker for until 4-5 whistles.


Once the pressure is off from the cooker, remove the excess water and keep the cooked soyabeans aside. If you wish you can remove the skin of the soyabeans that are already out from them. Take oil in a pan and put it on stove.


Once the oil is hot, add mustard seeds and cumin seeds.


When they splutter, add red chillies and curry leaves.


Add a little turmeric and sauté for a minute.


Pour the cooked soyabeans. Add salt and mix well.


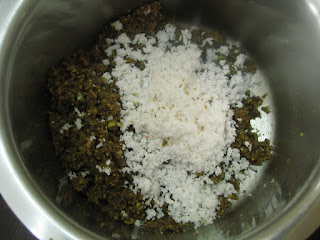
Throw in the grated coconut and mix well.


If you want a little spicy, you can also little chilli powder. Mix well and switch off the flame. Serve to God as  Prasadam and to your family as well.

  
white bean sundal recipes


Ingredients


Soyabeans 1 cup

Oil / Ghee 1 tsp

Mustard seeds 1/2 tsp

Cumin seeds 1 tsp

Curry leaves few sprigs

Red chillies 2

Salt to taste

Grated coconut 2 tbsp

Turmeric power 1/4 tsp

Chilli powder 1/2 tsp ( optional )


Method


  1. Soak soya beans in water for atleast 5 hours.
  2. Pressure cook the beans for upto 4-5 whistles. 
  3. Drain the excess water and keep the beans aside. 
  4. Heat oil in a pan and add oil in it.
  5. Add mustard seeds and cumin seeds. 
  6. When they crackle, add curry leaves and red chillies.
  7. Saute for a minute and put the turmeric powder.
  8. Add the cooked beans and salt. Mix well.
  9. Sprinkle the grated coconut and little chilli powder all over the beans.
  10. Mix well and switch off the flame. 
  11. Offer as Naivedhyam to God and enjoy with your family.

Notes


  • This kind of sundals can be prepared with other bean varieties as well.
  • You can also add peanuts, channa dal, urad dal etc., while tempering. 
  • This is no onion-no garlic recipe. But if you are not offering to God, then you can also add finely chopped onion and ginger pieces for the extra crunchiness.
  • You can also use ghee instead of oil for tempering.

This post has been submitted to the Livogen Iron Chef contest ...  http://www.livogen.in/iron-chef


Continue ...

pulihora making / pulihora recipe

0


Pulihora rice / Tiger Rice


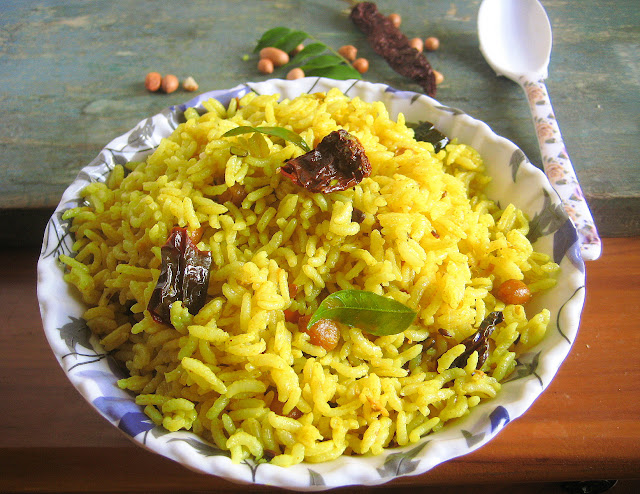
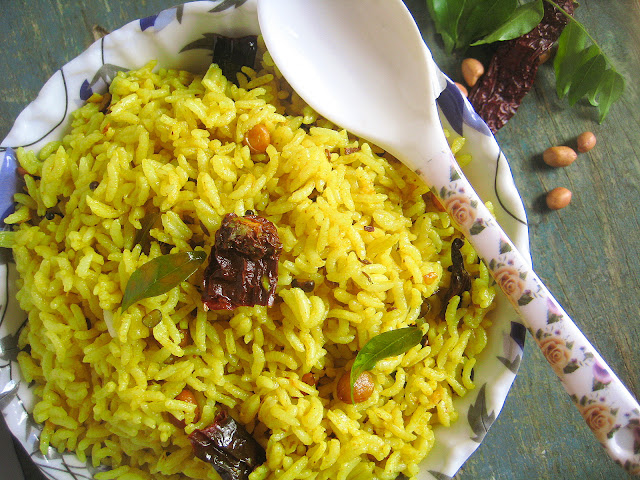
For the first day of Navrathri I have posted carrot kheer which tastes heavenly. For the second day of this Navrathri I am posting the most popular and famous yet simple dish of South India - Pulihora. Pulihora also known as tamarind rice in English is a must for any festival in South India especially in the Telugu states of Andhra and Telangana. Almost every household prepares this pulihora for any auspicious or festive occasions.

traditional pulihora


In my childhood days, my friends used to call this rice as tiger rice. Because puli means tiger in Telugu, hence the name. It indeed sounds very funny. My kids call it yellow rice. They always give names to the dishes with the colours they associate with. For example, they call palak rice as green rice, coriander rice as light green rice, beetroot rice as red rice, carrot rice as orange rice, etc.,.

tiger rice recipe


This tamarind rice is very simple and easy to prepare. Cook rice, do a little tempering and mix. That is it. Your dish is ready in minutes. The most important and crucial part of preparing this dish is the tempering. If the tempering is good, then only the dish will be perfect. You will not even ask for a side dish if the tempering is done well.  Pulihora is also one of the best lunch box idea recipes.

pulihora rice recipe


There are various versions of preparing pulihora. The version that I am presenting today is the most simple and easiest recipe. There are no masalas or spices that are added to this dish except that of ginger and garlic paste. There are other versions where you can add methi powder, coriander powder, cumin powder, etc.,. I will be discussing those recipes in another post. There is also a different version of preparing the temple style pulihora which I will be posting soon. But for today, I am finishing off with the most simplest version of preparing the yellow rice.


Preparation


Cook rice in a pressure cooker. Once the pressure is off, transfer the rice into a wide plate and allow to cool. Add 2 tsp of oil and gently mix without mashing the rice.


Extract juice from tamarind pulp and keep aside. Take a pan and add oil in it.


Once the oil is hot, add the mustard seeds, cumin seeds and methi seeds.


When the mustard seeds splutter, add peanuts and roast for 1 minute.


Now add the split urad dal. I have used to urad dal with the skin on it. You can use the normal ones which doesn’t have any skin on it. You can also add channa dal and moong dal as per your preference.


When the peanuts change to a light brown colour, add red chillies.


Fry for a minute and add hing and curry leaves.


Sauté for a minute and put the green chillies.


Give a nice mix and add the ginger garlic paste.


Mix well and put the turmeric powder.


Sauté for a minute and add tamarind juice and sugar. Also add salt and mix well.


Bring it to a boil. Cook until you see oil floating on the top.


At this stage, switch off the flame and pour it on the cooled rice.


Mix gently taking care not to mash or break the rice. If by any chance, lumps are formed in rice, mix with your hand breaking the lumps gently. 


Check for seasoning. If the sourness is not sufficient for you, you can add the juice of lemon. Else cook some more tamarind juice and add to the rice. Adjust salt and spice as per your taste and transfer to a serving bowl. This is served to God as Naivedhyam and can be enjoyed with family and friends. 

  
festive recipes


Ingredients


Rice 2 cups

Oil 3 tbsp.

Mustard seeds 1 tsp

Cumin seeds 1 tsp

Fenugreek seeds 1/4 tsp

Peanuts fistful

Split urad dal 1/2 tsp

Red chillies 3

Hing 1/4 tsp

Curry leaves few sprigs

Green chillies 4-5

Ginger garlic paste 2 tsp

Turmeric 1/2 tsp

Tamarind  Juice extracted from the size of 2 lemons 

Salt to taste

Sugar 1 tsp


Method


  1. Extract juice from tamarind and keep aside. 
  2. Cook rice and transfer to a wide plate to cool.
  3. Take oil in a pan for tempering. 
  4. Add mustard seeds, cumin seeds and fenugreek seeds. 
  5. Once they splutter, add peanuts and urad dal. Any kind of lentils can be added according to your desire. 
  6. When the peanuts change colour, add red chillies and hing.
  7. Sauté for a minute and add curry leaves. 
  8. Cook for a minute and add green chillies. 
  9. Mix well and add ginger garlic paste. 
  10. Saute for 2 minutes and add turmeric powder. 
  11. Mix well and finally pour the tamarind juice with salt and sugar. 
  12. Cook until you see oil floating on the top ( uncovered ). 
  13. When you see oil floating, switch off the flame. 
  14. Pour this tempering on the cooled rice.
  15. Mix gently without breaking or mashing the rice. 
  16. Adjust salt, spice and sourness and take it into a serving bowl.
  17. Serve hot with plain curd, raita or any masaledaar curry.


Notes


  • Tempering should be done very well for the best taste of pulihora.
  • Any kind or all kinds of lentils can be added according to your likes or availability. 
  • Adding sugar will enhance the taste of the pulihora cutting out on the sourness of the tamarind. 
  • Salt, spice and sourness should be perfect for the dish, else you will have to compromise on the taste.
  • Other versions of pulihora will be discussed very soon. Watch this space for more.


Continue ...

Carrot Kheer / Carrot Payasam

0


Carrot Kheer / Navrathri Special Recipes


Starting from today, I will be posting one recipe each day for the 9 days of Navrathri festival. These recipes can be served as Naivedhyam for God and are also very healthy and filling. They are the perfect festive dishes for fasting as well.

carrot kheer recipe

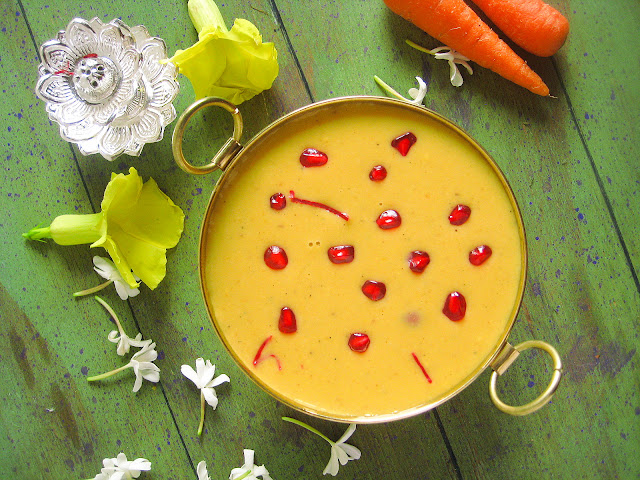
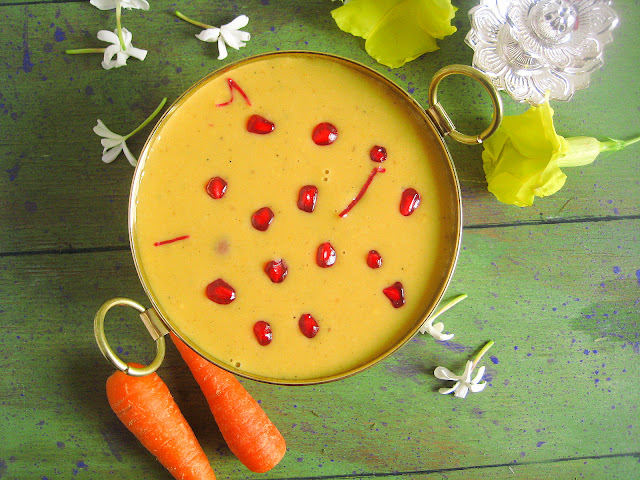
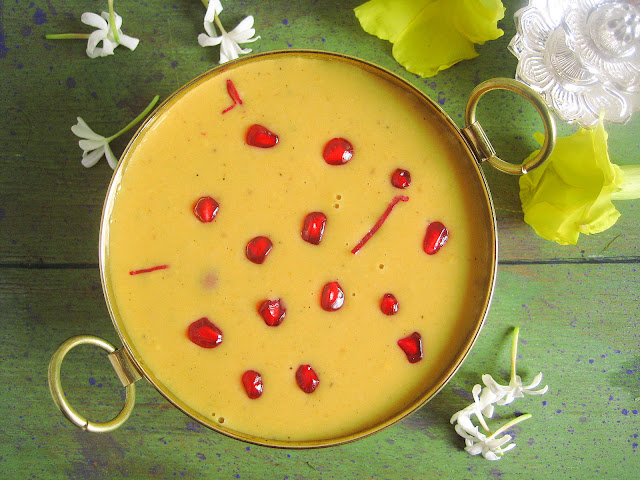
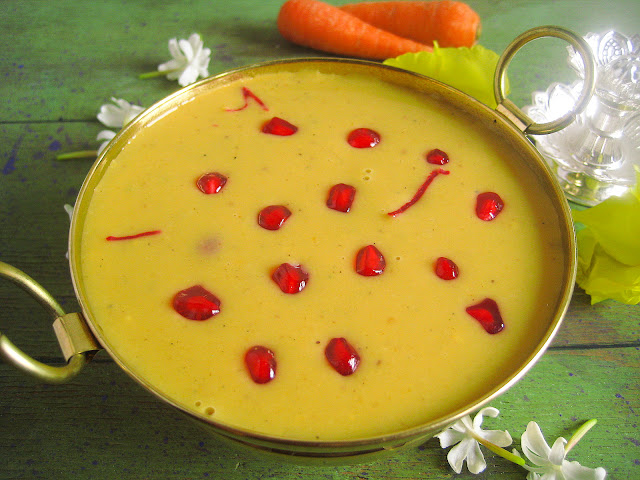
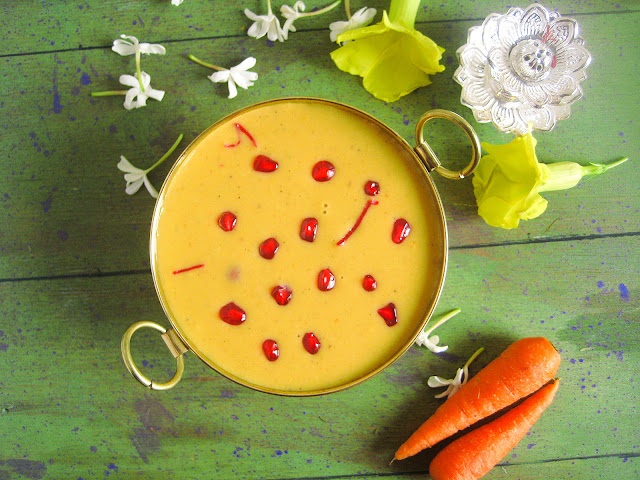
Carrot kheer or carrot payasam is the first naivedhyam recipes that I am posting for this Navrathri season. Carrot kheer is so very healthy and delicious that it will not only refresh your body but soul as well. This has all the ingredients that provides energy to our body in this festive season. All your guests who visit during the festive days will be appeased when you serve this simple carrot kheer.

carrot payasam recipe

Carrot kheer is rich and creamy, yet light on the tummy. The lovely orange colour of this sweet dish is very appealing to our eyes. The taste is heavenly and is a perfect dish that can be served to God as Prasadam. It has all the benefits of the veggies ( carrots ), milk ( complete food ) and dry fruits ( nutritious ).

navrathri specials

The taste is similar to that of badam milk with a little flavour of carrots. I have used minimal amount of carrots and more badam to get the almond flavour from the milk. You can always increase or reduce the amount of almonds or carrots as per your liking and tastes. According to me, the measurements given were just perfect for me and my family.

carrot almond kheer recipe

I have not included any fat ( ghee, oil , etc. ) in this payasam making it a guilt free recipe. Hence, it is very light on your tummy. My family simply loves this payasam and always ask for more. This is also one of the best methods to feed kids who are fussy on eating veggies in their diet.

easy carrot kheer recipe

Carrot payasam is very simple to prepare in no time with basic ingredients that are easily available in our kitchen. Dice the carrots, put in the cooker along with almonds and cashews. Grind to a paste and cook with milk and sugar. It is very simple as said. This is definitely considered to be a beginner´s recipe.    

Preparation


Soak the almonds for atleast 15 minutes and peel the skin. Keep them aside. Peel the skin on the carrots and dice them into circles or small cubes.


Put them into the cooker along with cashews and peeled almonds.


Add little water and cook until 2-3 whistles or until the carrots are soft. Allow the carrots to cool. My carrots actually burnt a little as I put very little water in the cooker. Please excuse me guys for this.


Put the cooled carrots, cashews and almonds in the mixie jar and grind to a fine paste. Keep this aside.


Take boiled milk in another vessel and add sugar.


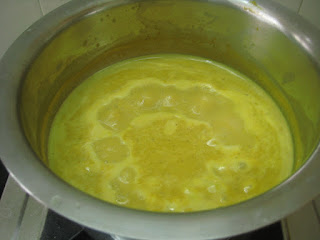
Allow sugar to completely dissolve in the milk. Now add the grounded carrot paste and mix well.


Cook until one boil and switch off the flame.


Add cardamom powder and mix well. Garnish with saffron strands and pomegranate seeds.

carrot cashew kheer recipe


Ingredients


Carrots  5 ( small sized ) OR 150 g OR 1 cup of diced carrots
Almonds  10
Cashews  25
Sugar  3/4 cup
Milk  2 1/2 cups
Pomegranate seeds few to garnish
Saffron strands 2


Method


  1. Soak the almonds in water for 15 minutes and peel the skin and keep them aside.
  2. Dice the carrots. Cook the diced carrots, cashews and almonds with water in pressure cooker until 3 whistles or until soft.
  3. Allow the cooked carrots to cool. Grind to a fine paste and keep aside.
  4. Add boiled milk in a pan and add sugar to it. 
  5. Let the sugar dissolve in the milk and add grounded paste to it. 
  6. Mix well and cook until a boil. 
  7. Add cardamom powder and mix well. 
  8. Switch off the flame and garnish with fruits or dry fruits as per your preference.
  9. Serve warm or chilled. 

Notes

  • You can roast the dry fruits like pistachios, cashews, dry grapes in ghee and add to the carrot kheer.
  • 2 tsp of ghee can also be added to make the carrot payasam rich.
  • The consistency of the carrot kheer was not too thick nor too thin. 
  • If you want a  more thicker consistency then cook for some more time. Alternatively you can also reduce the amount of milk. 
  • The carrot kheer can also be prepared with condensed milk. Dilute the condensed milk with milk and add the sugar paste. 
  • You can add any kind of fruits like apple, pineapple or papaya and relish it as a custard.
Continue ...

coriander coconut pulao / pulao recipe

0

Coconut Coriander Pulav


easy pulao recipe


I love pulavs - let it be of any version. They taste awesome with all the flavours of masalas bursting out along with the goodness of all the veggies included in the rice. These kinds of pulavs or flavoured rice are very nice for our tummy especially during the monsoon or winter days when we want to have all spice in our foods. These spices like black pepper, cardamom, cinnamon, ginger and garlic actually
Continue ...

Poornam Boorelu / pesala Boorelu

0

Poornam Boorelu / Whole Moong Dal Boorelu 


andhra boorelu

This weekend is Varalakshmi Pooja. I am sure everyone must be busy preparing for the big day. Shopping, cleaning homes, decorating puja room and idols. Married women are totally busy with all these work. These are the work that is to be done before the Varalakshmi Puja day. 

boorelu

On the Pooja day, we are totally busy with preparing Kalasam, decorating the Goddess Lakshmi Devi idol, preparing Naivedhyam for Goddess Lakshmi and other such activities. Everything will go well if plan our to-do list well in advance. Planning will help in doing things smoothly and without any fuss. Right from the sarees we want to wear, till the flowers we use for decoration, plan and keep everything ready to avoid the last minute hurry.

whole moong dal boorelu
For this special occasion, I am sharing the recipe of Pesala Boorelu ( Whole Moong Dal Boorelu ). This is a popular Andhra recipe which is made during festive occasions specially during the festive season of Sankranthi ( Pongal ). These are also known as Poornam Boorelu.  Boorelu are traditional sweets that can be made with channa dal, moong dal, whole moong dal, coconut-rava or with chenna. They can be made with many other variations as well which I will be sharing soon. You can also check my other Naivedhyam recipes :

Tempered black chickpeas
Easy Coconut Ladoo Recipe
Banana Appalu
Paneer Payasam
Spongy rasgullas
Dates and Nuts Ladoos
Kalakand


poornam boorelu

I have heard many people think that Boorelu are very difficult to prepare. But it’s a false thought. They are very easy to prepare provided you follow the simple tricks and techniques that are mentioned here. This was the first sweet that I prepared after my marriage and I was on the Cloud Nine after that. Because my man loved them to the core.

instant batter boorelu

Pesala Boorelu are very healthy and tasty too. I have used jaggery in this recipe. But if you wish you can replace it with sugar. For the outer skin, I have prepared and instant version of batter which does not require any soaking, grinding or fermentation. Firstly, we prepare the stuffing that should go inside the boorelu ( i.e. poornam ), then dip them in the batter and deep fry them. Its as simple as said. So, lets get into the preparation of these Pesala Poornam Boorelu.  

pesala boorelu


Preparation


Take the whole moong dal in a vessel. Check for any inpurities and wash them thoroughly. Add clean water in the vessel and put it on the stove.


On a medium flame, cook the whole moong dal. Keep stirring occasionally. Cook until the whole moong dal is soft and cooked. But it should be grainy.


To check if it is cooked till the correct stage, take a grain of whole moong dal between your thumb and index fingers and crush it. It should become mashy. 


Now switch off the flame and drain the water right away. Allow this to cool. 


Meanwhile, lets get the other ingredients ready. Grate the coconut and keep aside.


Grate the jaggery and keep aside. If you are using sugar, make a powder of the sugar and keep it aside. Take the cooled moong dal in a blender along with cardamom pods.


Make a coarse powder of this mixture. Do not add any water while making the powder. In case you are preparing in large quantities, then make the powder in batches. Transfer this to a big vessel. Add grated jaggery ( or powdered sugar ) and mix well.


Alternatively, you can grind both the jaggery ( or sugar ) along with the cooked moong dal together and transfer to a bowl. To this dal-jaggery mixture, add grated coconut and mix well.


If this mixture is too watery and you are unable to give shape, then put this mixture on the stove and cook until it dries up a liitle. Keep stirring continuously while cooking to avoid burning and sticking at the bottom of the pan. Cool this mixture and make small balls from this mixture. Keep them aside.


Now lets prepare the batter for the poornam boorelu. There are 2-3 variations for making this batter. The tradidtional way of preparing the batter is by soaking the urad dal and grinding it and then fermenting it for 5-6 hours. But here I am using an instant batter which does not require any soking, grinding or fermenting. I will mix maida ( all pupose flour ) and rice flour and make a batter. There is another variation for the instant batter with wheat flour. We mix maida and wheat flour and make a batter. But I personally feel that the second variation gives a hard outer skin where as the first variation will yield a soft and crunchy outer skin of the boorelu. So, here in this recipe, I am sticking to the first variation with rice flour. Take the maida and rice flour with a pinch of salt and mix well.


Add water little by little and mix thorouhgly so that there are no lumps in the batter. The batter should not be thin. So do not add more water. The batter should be of dropping consistency and not that of pouring consistency.


If you think that the batter is too thin then add little maida and make it a thick batter. Now that we are all set, heat oil in a pan.


To check if the oil is hot enough, put a small drop of batter, it should not come up immediately. It should come up gradually. At this point, dip the moong dal mixture into the batter with your fingers.


Coat the batter well all around the ball. And gently place the coated ball in the oil to deep fry.


Place 4-5 such balls in a batch.


Cook them on a low to medium flame until the balls turn light golden in colour. Remove from the oil on place on a paper napkin to remove the excess oil.


Repeat the process for the remaining balls and finish off. I could make around 25 boorelu with the measurements given below. These Poornam Boorelu ( whole moong dal boorelu ) stay good for upto 2-3 days. Enjoy with your family.

festive recipes


Ingredients


Whole Moong dal 1 cup
Jaggery 1 cup
Grated coconut 1/4 cup
Cardamom pods 5
Oil to deep fry             

For batter


Maida 1/2 cup
Rice Flour 1/2 cup
Salt a pinch


Method


  1. Wash the whole moong dal and cook with water. Cook until it becomes soft but still has the grainy consistency. Press between your index and thumb fingers and you should be able to mash it.
  2. Drain the excess water from the cooked moong dal and allow to cool.
  3. In the mean time, grate the coconut and jaggery and keep aside.
  4. Take the cooled moong dal in a blender along with cardamom pods and make a coarse powder.
  5. Add grated jaggery, grated coconut and the powdered moong dal and mix well.
  6. Make small balls out of this mixture. If the mixture is too watery, put it on the stove for a few minutes until it dries out. Keep stirring continuously while cooking to avoid sticking at the bottom of the pan.
  7. Mix maida, rice flour and salt in a bowl and mix well.
  8. Add water little by little and make a thick batter.
  9. Mix vigorously such that there are no lumps in the batter.
  10. The batter should be thick, and not too thin. If you feel the batter is thin add more maida and make it thick.
  11. Heat oil in a pan for deep frying.
  12. To check if the oil is hot enough, put a small drop of batter in the oil. It should not come up immediately. If it comes up immediately, the oil is very hot. Try to reduce the heat by adding more oil or reduce the flame for some time.
  13. Now, dip the moong dal balls in the batter and coat the batter well all around the ball.
  14. Place it gently in the oil. Cook atleast 4 balls in a batch.
  15. Cook on low to medium flame until they turn to light golden colour.
  16. Remove from oil and place them on a paper napkin to remove the excess oil.
  17. Repeat the process with the other balls.
  18. Serve them warm or at room temperature.
  19. These boorelu stay good for upto 2-3 days at room temperature.

Notes


  • Always use fresh oil ( preferable refined oil ) so that you do not have a oily smell or taste while enjoying the boorelu.
  • These poornam boorelu can be prepared with other stuffings like channa dal, rava-coconut and many other variations which I will be discussing very soon.
  • The moong dal mixture should not be watery. If by chance, it becomes watery and you are not able to give shape to it, then cook on a low flame until the water content evaporates and becomes thick.
  • Do not add too much water while preparing the batter. The batter should be thick. When you dip the ball in the batter, it should coat the ball evenly.
  • You can add more of grated coconut as per your preference as long as you are able to give shape to the moong dal dough. 

This post has been submitted to the Livogen Iron Chef Contest ..  http://www.livogen.in/iron-chef
Continue ...