healthy banana oatmeal muffins with yogurt / quick and easy oatmeal muffins / banana oatmeal yogurt muffins

0


Healthy banana oatmeal muffins with yogurt / quick and easy oatmeal muffins / banana oatmeal yogurt muffins


Banana 🍌 and oats - very good and healthy combination of food. There are so many dishes that can be prepared with this combo. Today I am sharing a simple muffin recipe with this combo of bananas and oatmeal.
 
healthy banana oatmeal muffins with greek yogurt

I had some over ripe bananas which my kids never dared to touch. So I had to use them in some preparation. I have already posted some recipes with over ripe banana like banana Choco bread 🍞, banana appalu. I wanted to prepare a banana walnut loaf bread with these over ripe bananas, but changed my mind and went ahead with these healthy banana muffins with yogurt.

quick and easy oatmeal muffins

These moist banana oatmeal muffins were so tasty 😋 that my man 👨 and kids loved them a lot. I also packed these tiny banana cupcakes for their snack break as well. These were loved by their friends as well. There is a secret ingredient added to this muffin recipe which might have contributed to that amazing taste.
 
banana oatmeal yogurt muffins

The secret ingredient is sugarcane juice. Yes, you heard it right. I have added sugarcane juice to these muffins. But, if you do not have it handy, then you can substitute it with maple
🍁 syrup. You can check my recipe to extract juice from the sugarcane at home. The other main ingredient that goes into the preparation of this egg free banana muffins is Greek yogurt. So these muffins are so healthy considering the fact that Greek yoghurt, bananas, sugarcane juice and oats are very good for health.
These breakfast banana muffins are soft, moist and delicious
😋. They can be had as such for breakfast, brunch or as an evening snack. Kids or elders who are hesitant to eat oats will love this muffin as they cannot even hint that they are made with oats.

breakfast banana muffins

You can also check my other bakes which are very healthy and nutritious


Preparation

Powder sugar and jaggery separately one after the other and keep aside. Similarly, make a fine powder of oats and sieve it through a fine strainer. Set aside. Mash the banana well with your hands or use the blender to make a smooth pulp without any pieces or lumps in it. Keep aside. Now take all the dry ingredients namely oat flour, maida, flax seed powder, salt, cinnamon powder, baking powder and baking soda in a bowl.


Take yoghurt in another bowl and add the banana puree.


Mix well and add olive oil.


Give a nice mix and add the sugarcane juice and vanilla essence. Mix well until combined.


Now add the powdered jaggery and sugar and whisk well until it is all mixed up completely.


Now add the dry ingredients mixture little by little. Mix well until incorporated. Do not over mix.


Pour into greased muffin tray or cups. Garnish with sliced pistachios or raisins or any other nuts of your choice. Bake at 180 degrees Centigrade for 30 - 40 minutes  or until a tooth pick inserted in the centre of the muffin comes out clean. Allow it to cool completely before removing them from the tray or cups.

eggless banana oatmeal cupcakes


Ingredients

Jaggery powder 1/2 cup
Sugar  1/4 cup ( powder it )


Dry Ingredients

Oat flour 1 3/4 cup
Maida 1/2 cup
Baking powder  1 tsp
Baking soda  1/2 tsp
Salt  big pinch
Cinnamon powder  3/4 tsp
Flax seed powder  1 tbsp.


Wet Ingredients

Mashed bananas 1 1/2 cups ( about 3 bananas )
Sugarcane juice  1/4 cup
Olive oil  3/4 cup
Vanilla essence  1 tsp
Greek yoghurt 1/2 cup


Method
  1. Powder the sugar and jaggery separately and keep aside. Powder the oats into fine flour and sieve. Keep aside.
  2. Mix all the dry ingredients in a bowl and set aside.
  3. Take the wet ingredients namely yoghurt, mashed bananas, vanilla essence, olive oil, sugar cane juice one after the other and mix nicely until everything is combined.
  4. Add jaggery powder and sugar powder and mix again.
  5. Now add the dry ingredients slowly little by little stirring well after each addition.
  6. Pour into greased muffin moulds or cups and top with nuts, raisins, dates or cherries 🍒.
  7. Bake at 180 degrees Centigrade for 30 - 40 minutes or until done.
  8. Cool completely before removing from the muffin tray.

Notes


  • Do not overmix the batter after adding the dry ingredients.
  • The original recipe calls for maple 🍁 syrup in place of sugar cane juice. 
  • You can top the muffins with any nuts or dates of your desire or a combo of any of these. 
  • You could also use whole wheat flour instead of oat flour.
  • Make sure that you puree the bananas well without any pieces in it. You can grind it in a mixie to get it right.
  • You can substitute cinnamon powder with cardamom powder if you like the flavour of the latter. 


Continue ...

Juicing Sugarcane / Sugarcane Juice Recipe / Sugarcane Recipes

0

Juicing Sugarcane / Sugarcane Juice Recipe / Sugarcane Recipes 


Today's recipe is made with another seasonal ingredient - sugar cane. The markets and shops are full of sugarcane sticks during pongal and the following month. This year my mom in law made the famous sweet  pongal dish with this sugarcane. It tasted awesome. I did plan to post the same but as told earlier, I was very busy to capture and update. But I sure would do the same in the coming posts one day.

sugarcane recipes

But for today, it's the sugarcane juice. Everybody I feel loves this sugarcane juice. My kids love this juice and they also love chewing the pieces as well. I make it a point to see that they eat the seasonal foods which are said to be loaded with nutrition and health thereby increasing the immunity in them.
This sugarcane juice is so very easy to prepare with no additional ingredients at all. Just peel the skin, chop into small pieces and put them in blender to extract the juice. So lets start off. 


sugarcane juice ingredients


Preparation

Peel the skin of the sugarcane sticks with the help of a knife 🔪.


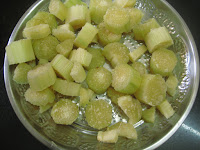
Then chop into small pieces removing the pieces that are hard in between.


Put these pieces in a blender ( mixie ) with little water. Add little water just enough to run the mixie jar. If you add too much water, then the juice will get diluted and will lose its sweetness.


Mixie well and strain the juice using a filter. Squeeze the pulp with your hands in the filter.


Repeat the process until you are done with all the pieces.


Add lemon juice if desired with some ice cubes and enjoy this drink with your family and friends. 

juicing sugarcane at home


Ingredients

Sugarcane 1/2 a stick


Method

  1. Peel the skin of the sugarcane with knife.
  2. Chop into small pieces.
  3. Put in a mixie jar and mixie with little water.
  4. Filter the juice and squeeze the pulp with your hands.
  5. Add lemon juice and ice cubes according to your liking and serve.

Notes

  • Do not add too much water while grinding in the mixie. Just add enough water to run the mixie.
  • I served plain juice as my kids prefer it that way.


Continue ...

how to cook cauliflower indian style / gobi kurma curry / cauliflower recipes for rice or roti /

0

 Cauliflower Gravy Curry / Cauliflower Kurma Curry / Gobi Curry for rice or roti 


easy cauliflower recipes indian
 
This is the season for fresh and cheap veggies. All the veggies are so fresh and they are available in such cheap prices that whenever I visit the Santhe here, I tend to buy all veggies which are way too much for a family of four. I get really tempted to buy fresh and seasonal veggies which are available only in some seasons. Cauliflower is one such veggie which is available in different sizes especially during the winter season. On one such Sunday, I found the local market filled with cauliflowers ( so fresh ) that I couldn´t resist myself from purchasing four cauliflowers.

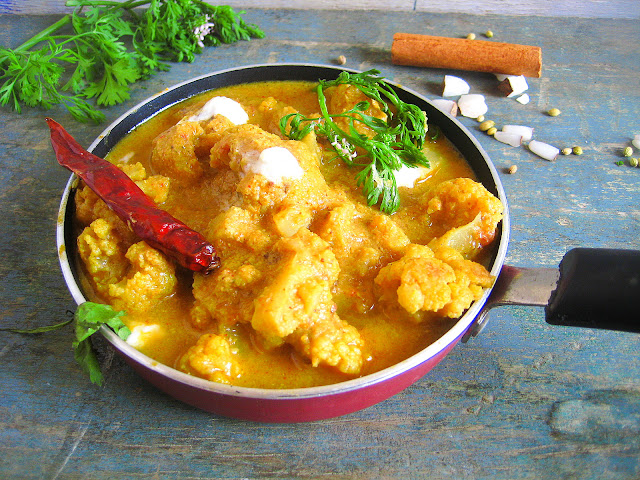
gobi kurma curry

My family loves cauliflower in any way - cauliflower green peas fry, gravy, kurma etc,. I also add small pieces of cauliflower in upmas as well. They simply love the addition of cauliflower in basically anything. Since I had many cauliflowers at hand, I thought of preparing cauliflower kurma recipe. This is an Indian style of cooking cauliflower which is very easy to make with simple ingredients.

gobi recipes for roti

This cauliflower gravy or gobi curry is a perfect side dish for many varieties - chapathi, roti, naan, dosa, rice, pulav or any other mildly flavoured rice variety. This kurma curry was so much loved by my kids. This is indeed a spicy curry, but I have reduced the spice to suit my kids taste buds. All the spice lovers out there can increase the spice according to your liking.  

gobi curry

The secret to such an immense flavour and aroma to this cauliflower curry lies in the list of the ingredients that go into the preparation of the masala ( gravy ). Each ingredient blends so well with the others making it an ultimate combo that suits very well with the cooked and roasted cauliflower florets. Needless to mention, this is yet another healthy food recipe that has been added to this blog . I hope each one of you will prepare this spicy and flavourful curry and enjoy with your family.

You can also view my Mixed Vegetable Curry which tastes amazing with chapathi or naan.

Preparation


Separate the cauliflower into small florets and wash carefully. Make sure that you remove all the insects if any. Cook these florets in water until they change their colour slightly and become a little softer.


While the florets are getting cooked, we will prepare the masala. Grind onion, garlic, ginger, cashew, poppy seeds, cloves, dalchin, coconut pieces and cardamom in a mixie to a smooth paste. Keep aside.


Now if the florets are done, switch off the flame and drain the water.


Do not throw away the water. We are going to use this water for the preparation of this gobi kurma. Keep the cooked pieces in a colander. Take a pan and heat 1 tbsp. of oil in it. Add the cooked cauliflower florets and let them get roasted for a while. Keep stirring occasionally.


Once they are roasted, transfer to another plate and set aside. In the same pan, add remaining oil and add cumin seeds.


When they splutter, add turmeric powder and add the ground masala.


Add salt and mix well and allow it cook on a low flame until the masala releases the oil on the sides. While this is getting cooked, prepare the tomato puree and keep aside.


Once the masala releases oil on the sides, add the tomato puree and mix well.


Add coriander powder and chilli powder and cook covered on a low flame ....


....until you see oil floating on the top of the gravy.


Now add water and add the roasted cauliflower florets and mix.


Add milk and cook for some more time.


Check for salt and spice and switch off the flame.


Serve hot after garnishing with cream and coriander leaves. 

how to make cauliflower kurma curry


Ingredients


Cauliflower 2 ( small ) Or 6 cups of florets

Chilli powder 1 tsp

Salt to taste

Coriander leaves to garnish

Oil 3 tbsp

Tomatoes 2  ( small )

Cumin seeds 1 tsp

Turmeric 1 tsp

Coriander powder 1 1/2 tsp

Milk 1/2 cup

To Grind


Onion 2 ( diced )

Cashew 1/4 cup

Garlic 6

Ginger 1"piece

Poppy seeds 3 tsp

Cloves 4

Dalchin 1"piece

Coconut 3 tbsp ( finely chopped )

Cardamom 2

Method


  1. Wash the florets, blanch and keep aside.
  2. Heat 1 tbsp. of oil in a pan and fry the florets. Transfer to a plate and keep aside.
  3. Grind all the ingredients that are mentioned under ´´ To Grind ´´ and prepare the masala.
  4. Heat remaining oil in a pan and add cumin seeds and turmeric powder.
  5. When the cumin seeds crackle, add the ground masala and salt and mix well.
  6. Cook on a low flame until the oil releases from the sides. 
  7. Now add the tomato puree, chilli powder and coriander powder and mix well. Cook covered on a low flame until the oil starts floating on top of the gravy. 
  8. Now add some water, fried cauliflower florets and milk. Mix well. 
  9. Check for salt and spice and cook for a few more minutes. 
  10. Garnish with coriander leaves and cream and serve hot with rice, roti, chapathi, dosa or any other flavored rice.

Notes


  • You can increase or decrease the amount of spice as per your desire. 
  • Adding milk is optional but it gives a richness to the curry. 
  • Other veggies like green peas, beans, potatoes can also be added to this kurma curry.
Continue ...

Freezing Green Peas / Best Frozen Peas / How to Freeze Green Peas At Home / Homemade Frozen Green Peas

0

Freezing Green Peas / Best Frozen Peas / How to Freeze Green Peas At Home / Homemade Frozen Green Peas


how to freeze green peas at home

Hey friends, I was so busy the whole of last month since Christmas. The visit of my in laws, the festive season of Pongal and my man's birthday 🎂 kept me away from updating this blog. But I am back with more energy, enthusiasm and of course interesting recipes.
Today's recipe is very useful to make our lives easy and hassle free. This is the recipe to prepare homemade frozen green peas. Everybody loves green peas but we all know that they are seasonal. Using this method we can store green peas for almost a year and enjoy this seasonal veggie for the whole of the year. Though frozen peas are easily available in the market, I prefer to make them at home for three main reasons. Firstly, I have the option to choose the best green peas and remove any rotten ones. Secondly, they are more economical when compared to the store bought ones. Lastly, they are more hygienic when prepared at home.


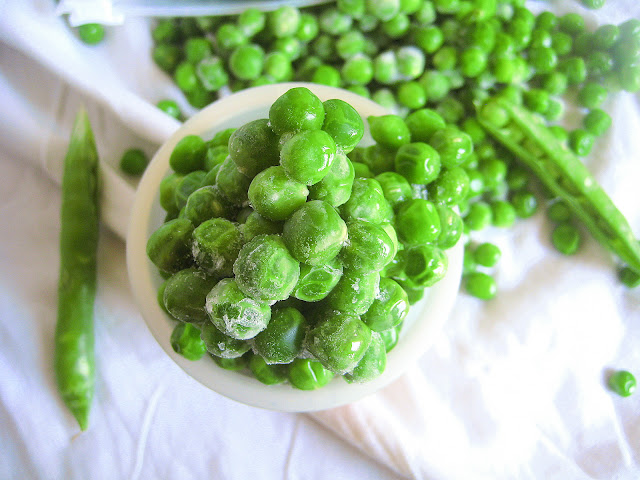
homemade frozen green peas

To get perfect frozen peas, you need to select the fresh ones which are neither under ripe nor over ripe. The under ripe peas are the ones which are small in size and are very tender. The over ripe peas are fuller and are lighter in colour when compared with the just ripe green peas. The over ripe peas are bitter in taste while the just ripe peas are sweet in taste and soft on cooking. Here in this recipe, we are going to blanch the green peas and freeze them for a long time. Blanching is very important to freeze the peas, else they will ripe even in cold temperatures. Blanching the peas will stop them from ripening and retaining their sweet taste for a long time to come. 

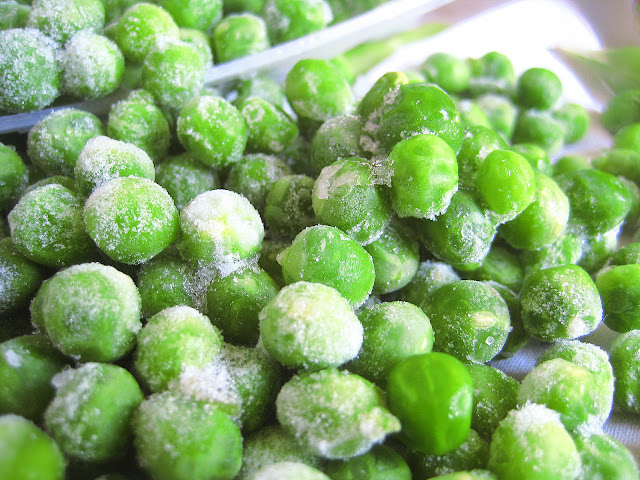
storing green peas for a year

I had this recipe in my drafts folder since last year, but unfortunately I could not get fresh green peas. So this year, I made it a point to get to the local market which is called Santha that is held every Sunday near my place. I indeed was lucky 🍀 enough to lay my hands on the best green peas that were fresh from the farm. Now straight to the recipe.

Preparation


Separate the green peas from their pods. This task might eat your time, but its worth the effort. You can do this while watching any of your favourite TV 📺 show to save your time. Wash the peas and keep them aside. Put a container of water on full flame and bring it to a boil.


Add the washed peas when the water is boiling. Continue to cook on high flame until the water starts to boil again.


When the water starts to boil again, set the timer to 1 1/2 minutes ( 90 seconds ). Once the timer stops switch off the flame immediately. 


By this time, all the peas would be floating on the water.


Now quickly strain the water from the peas using a colander and put it under running cold water until the peas come to room temperature. 


You can also pour some ice cubes or ice cold water in the green peas to stop the cooking process. Once they are cooled, dry them on a clean kitchen cloth or a cotton cloth ...


......until there is no moisture left on the peas.


Now, you can pack them in zipper bags or freezer safe containers and store them in your freezer shelf.


Use them when necessary. Just thaw them before using or keep the required amount of peas at room temperature for half an hour before using in your preparation. I follow the second method. 

how to store green peas for long time

Ingredients


Green peas 1 kg
Water  1 1/2 litres


Method

  1. Discard the pods from the seeds and wash the peas and keep aside.
  2. Bring a big bowl of water to a boil on a high flame.
  3. Add the peas when the water is boiling and cook on a high flame until it starts boiling again.
  4. Set the timer to 1 1/2 minutes and switch it on the moment the water starts boiling again.
  5. Switch off the flame as soon as the timer is stopped and drain the water using a colander.
  6. Add some ice cold water or ice cubes or put it under cold running water to stop the cooking process.
  7. When the peas are cooled, dry them on a clean kitchen cloth until there is no moisture left on them.
  8. Transfer these dried blanched peas to zipper bags or freezer safe containers and freeze them until use.
  9. These frozen peas stay good for months to come.

Notes


  • Make sure that you are using a wide and big bowl for blanching the peas. There should be enough space for the peas to cook else they will not get cooked properly.
  • The process of cooking should be stopped as soon as possible after the timer has ran out, otherwise the peas cook further because of the warmth and will become mushy for later use.
  • You can also label these packs of frozen peas with their respective dates of preparation for future reference.
  • Do not cook for more than the given time i.e. 1 1/2 minutes ( 90 seconds ).
  • Whenever you want to use them, just keep the required quantity of frozen peas at room temperature for half an hour and then your peas are ready to be used in any recipe.
  • You need not cook these frozen peas for a long time in any recipe. Just add them at the end of the recipe i.e. just 5-10 minutes before switching off the flame and you will be done. 


Continue ...